

- Add, edit, and display return reasons in the Admin Dashboard
- Add follow-up questions (including mandatory questions and media requests)
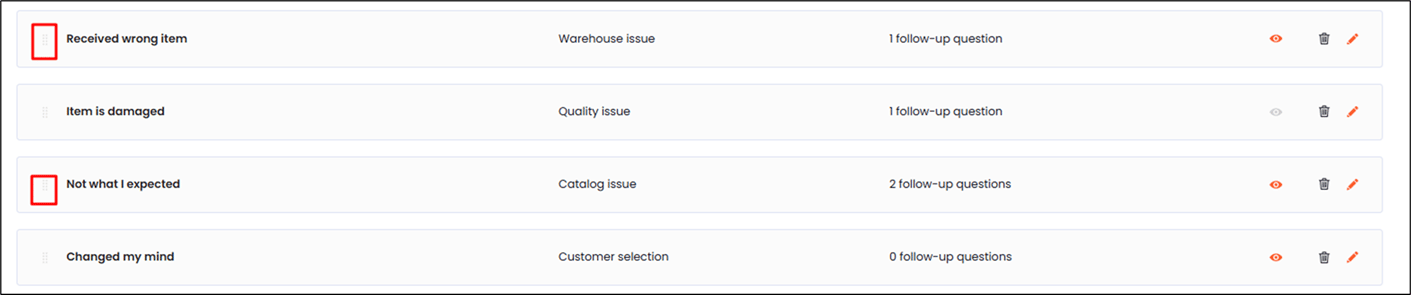
- Reorder reasons to control how they appear in the new return portal
- Find return reasons on an RMA and analyze return reason trends in Analytics or exports
- Decide which reasons should be customer-facing (vs. internal-only).
- Provide details (e.g., Damaged > request photo).
- Keep reason names short and customer-friendly; use follow-up questions for specifics.
- Navigate to Settings > Return Reasons.
-
Do one of the following:
- Create a return reason - click ADD REASON.
- Edit a return reason - click the pencil icon next to an existing reason to edit it.
- Enable Display reason to make the reason visible to customers in the new return portal.
- Edit the reason’s display name.
- Set a return reason category.
- Click the save icon in the top right hand corner of the page.
To add follow-up questions to a return reason
- Click the edit icon corresponding to a return reason.
- In the Return Reasons editor, click ADD QUESTION.
- Click the pencil icon next to the follow-up question to configure it.
- Toggle Display question so customers see it in the new return portal.
- (Optional) Toggle Mandatory question to require an answer.
- Edit the Internal name (for internal reference/reporting).
-
Choose an Answer type:
- Free text
- Media text
- Multiple choice
- Numerical stepper
- Yes/No
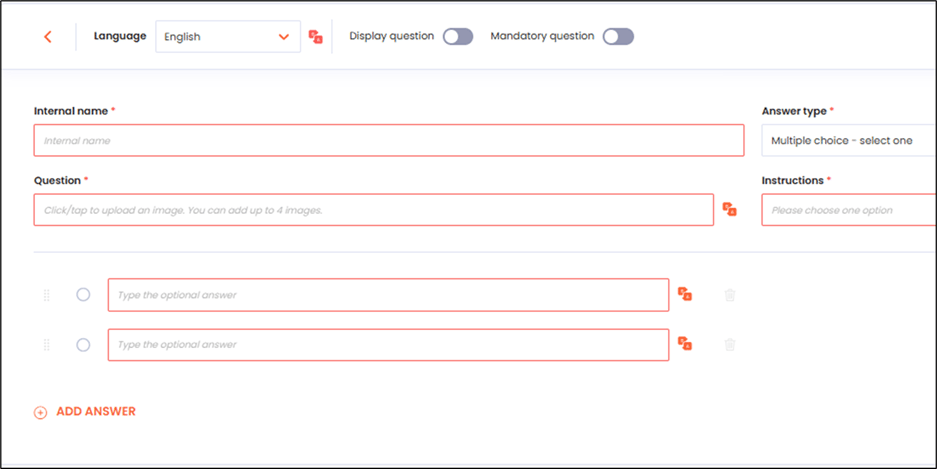
- Enter or edit the customer-facing Question text.
- Enter instructions in the Instructions field using the plus and minus buttons to set the quantity.These numbers set what the Customer should provide.
-
Configure any additional settings required by the selected answer type, such as media type or multiple-choice options.
The following limits apply to the Media Request:
- Customers can upload up to four images or videos at a time
- Supported image types: JPG, JPEG, PNG, HEIF
- Click the save icon in the top right corner of the page.
- Navigate to Settings > Return Reasons.
- Drag and drop return reasons into your preferred order.
To verify created returns
-
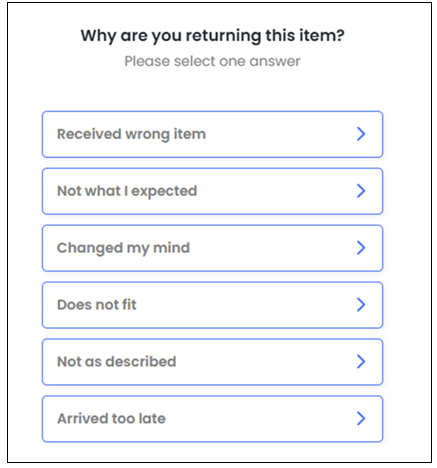
Verify the return in the New Returns Portal:
- Start a return for an order in the new return portal.
- Select an item to return.
- Confirm the customer sees your enabled reasons (those with Display reason turned on).
-
Select a reason that has follow-up questions and confirm:
- Questions appear after selecting the reason
- Mandatory questions must be completed before continuing
-
Media requests allow uploads (and video uploads only if the add-on is enabled)
-
Verify on the RMA in the admin dashboard
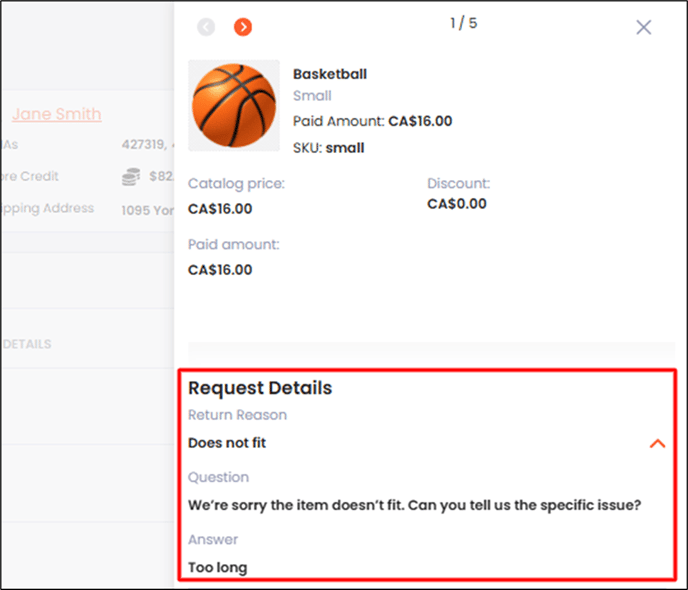
- Navigate to Manage Returns and open an RMA.
-
In the item Details area, check the Details section (right side) to see the selected return reason next to each returned item.
Frequently Asked Questions
The following table shows some common frequently asked questions and their answers: